
How To Edit Your Zoom Recording in the Cloud

The edit feature for cloud recordings in Zoom is helpful if you want to control where a recording starts and ends.
This tutorial will walk you through the steps of editing a Zoom recording you have saved to the cloud. The steps below are only applicable if you have a paid Zoom account AND you opted to save your recording to the cloud as opposed to saving it to your computer. Note that you can only edit where the recording begins and ends. Also, you can test your handiwork by grabbing the share link and pasting it into an incognito window in Chrome or a private window in Safari.
Step 1 – Log in to Zoom.us with the same credentials you use for your locally installed instance of Zoom.
Step 2 – Go to the Recordings Section.
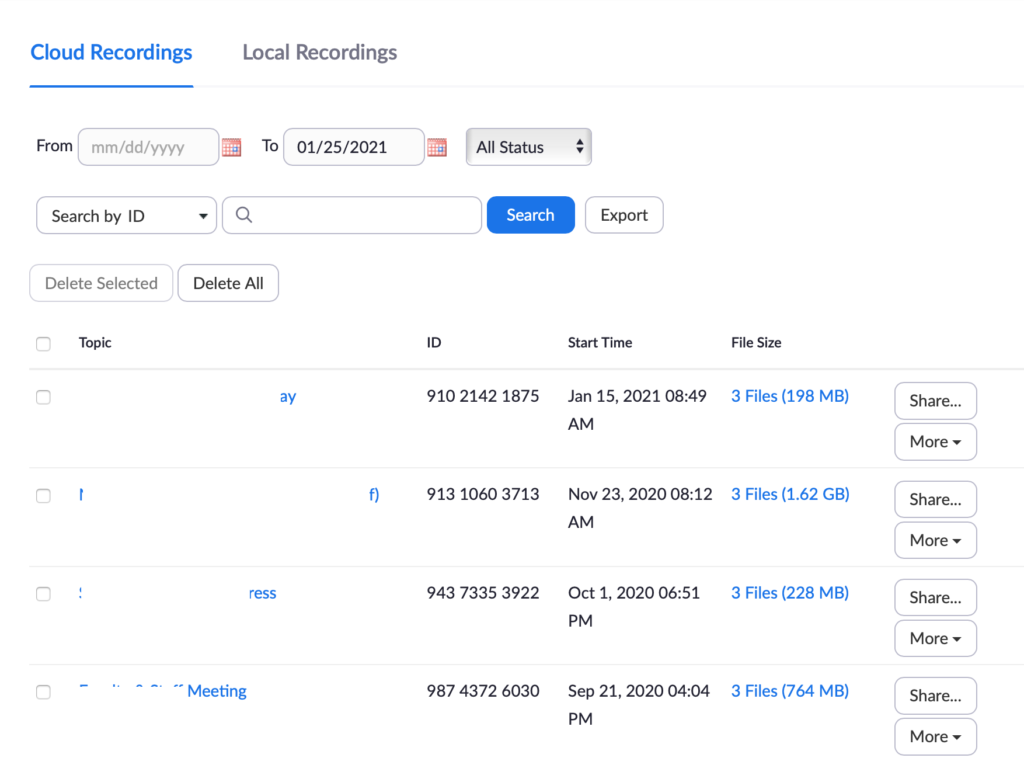
Step 3 – Choose the recording that you’d like to edit by simply clicking on the recording name.
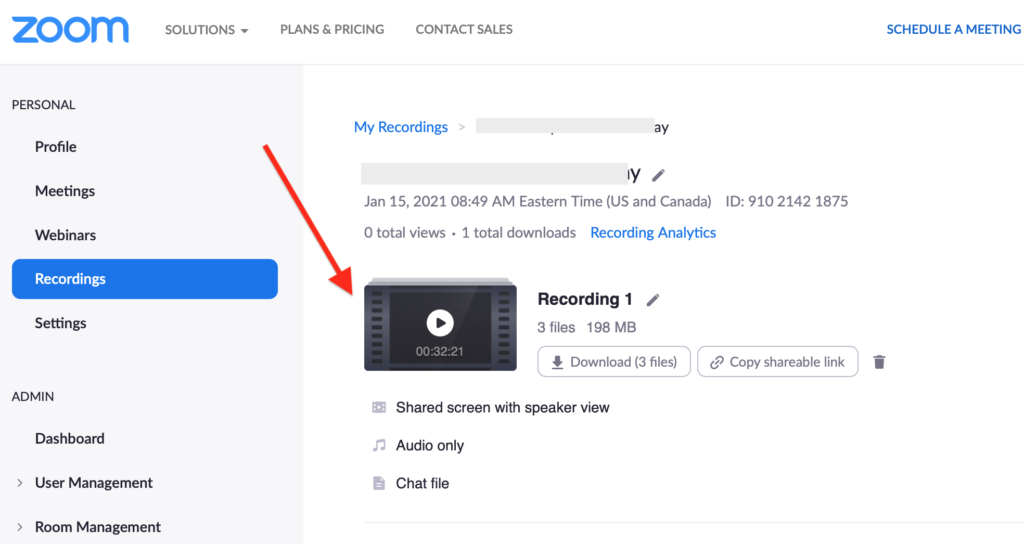
Step 4 – Click on the recording thumbnail.
Step 5 – Click the scissors icon.
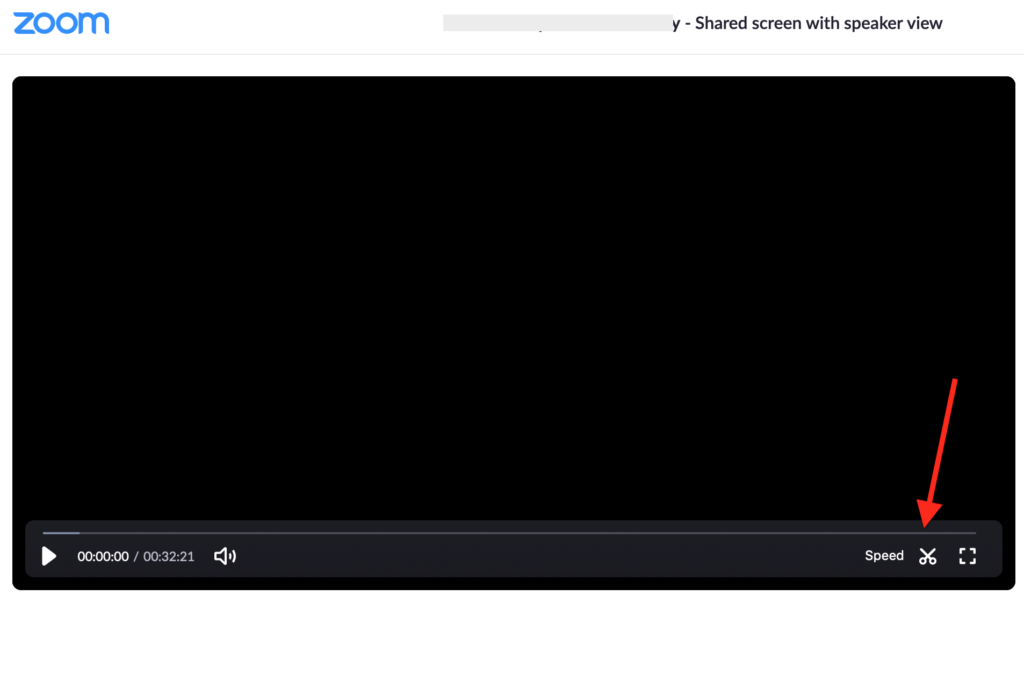
Step 6 – Adjust the sliders on the left and right side to mark where you’d like the recording to begin and end.
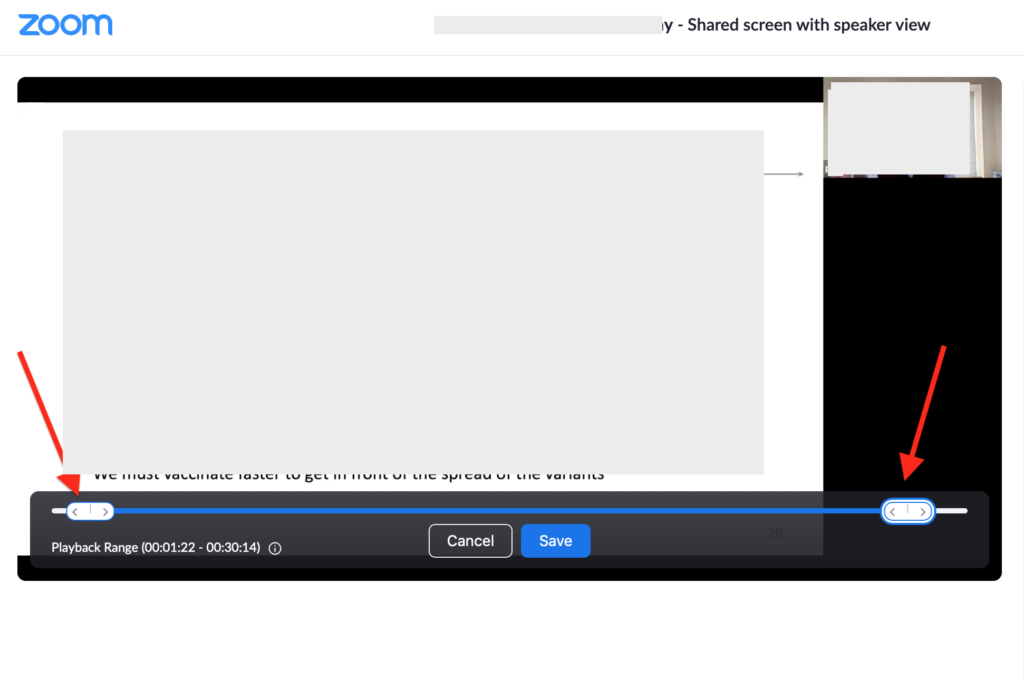
Step 7 – Click Save and you’re done with editing!
How To Create a Report in Veracross to view the Number of Emails Parents Receive

5 Books That Should be in Every School Makerspace
How to Create Name Badges in Veracross that include Children’s Names
About The Author
Tim
Tim Schwartz brings over 25 years of experience in the tech space. A lifelong learner, Tim has spent his career in spaces that allow him to combine his loves of technology and education. He cites his 12 years working abroad in a foreign language along with his BA in cultural anthropology for his deep understanding of the humanity behind different perspectives—a valuable and somewhat rare skill among technologists. Tim focuses on strengthening cybersecurity while increasing employee productivity, centralizing mobile device management, automating identity management and access, digitizing analog workflows, and introducing marketing automations to provide a positive—and digitally secure—experience for both employees and clients. Tim’s love of not only learning but also sharing what he knows extends far beyond the realm of technology. He holds a master’s degree in teaching Japanese as a foreign language, and he has authored numerous articles about improving early education and parenting.