
How to Create Name Badges in Veracross that include Children’s Names
Note that I may earn a small commission when you make purchases through links on my site. This is at no additional cost to you and helps support my blog. Thank you for your support!
Veracross has made it easy to generate name badges in Axiom eliminating the need to export the query results out into a spreadsheet to do a mail merge in MS Office. This is really helpful but there are some caveats like not having the ability to add a logo to the badge.
Here are the steps we took to create name badges for an event for our fathers where we wanted to get our father’s names listed with their children’s names below their name:
Step 1: Decide whether you will start with a Find Person base query or from the attendance for a given event. If you’re using the online event registration module to have people register then you can start with the event attendance as your base query. The only caveat is that some parents may register on behalf of the other spouse so the badge name may be wrong. We use a Find People query and add the following fields: Person: First Last, Person: Related Children and Group Name: Fathers. Then, we unchecked all of the other fields.
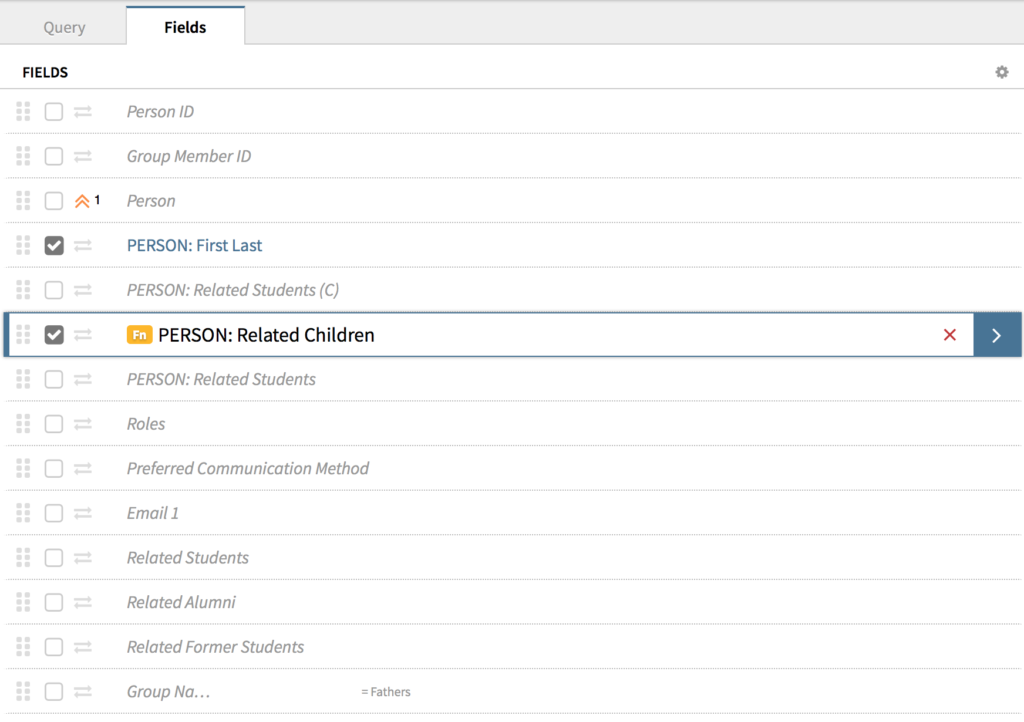
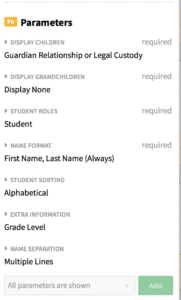
Note that the Person: Related Children field is a function field. This is where you’ll specify some important details depending on what you want to display on the name tag. We like to have all of the children display under the parent’s name along with the child’s grade level. Also note that if you just run the query as is then only one child will display but once you switch the query results to output as name tags then all children will display per parent.
Step 2: Click on the Query tab at the top and choose Labels.
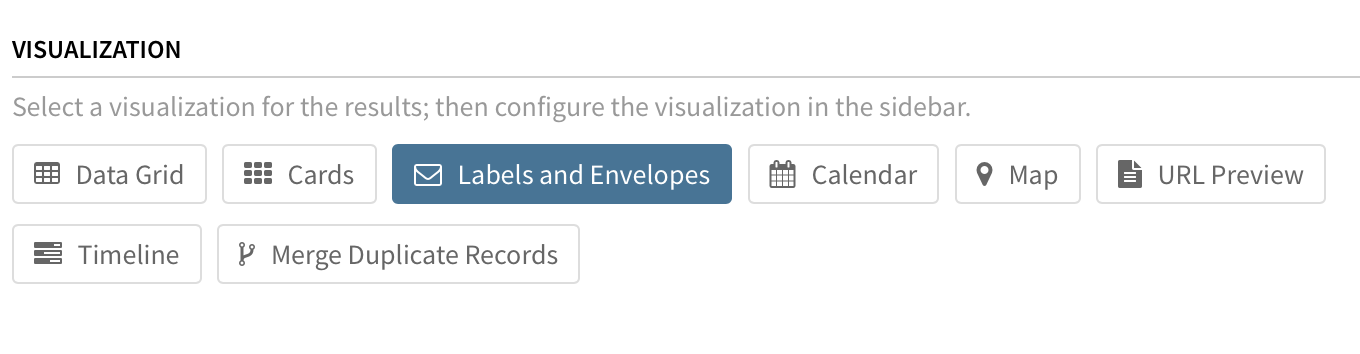
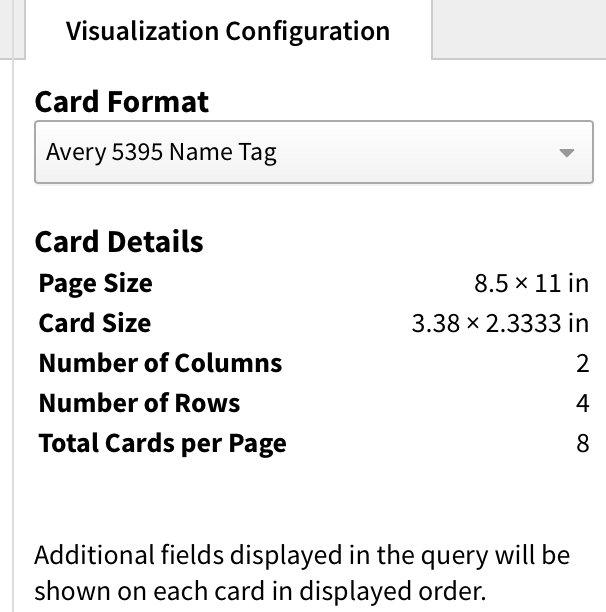
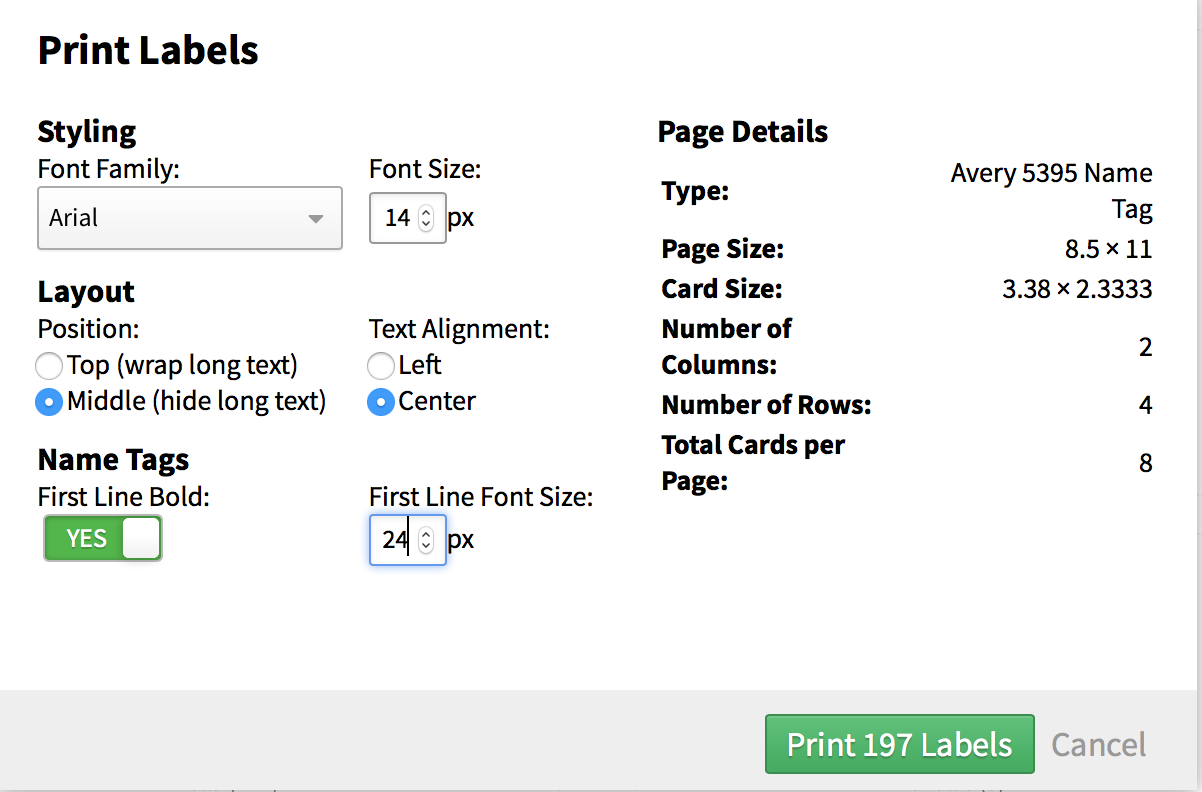
Then, choose the kind of label paper you’re using from the Card Format drop down menu on the right side of the screen. We use Avery 5395 Name Tags.
Step 3: You’re ready to run the query now. Don’t be surprised when the query returns results in the form of unformatted labels. You’ll do the formatting in the next step. 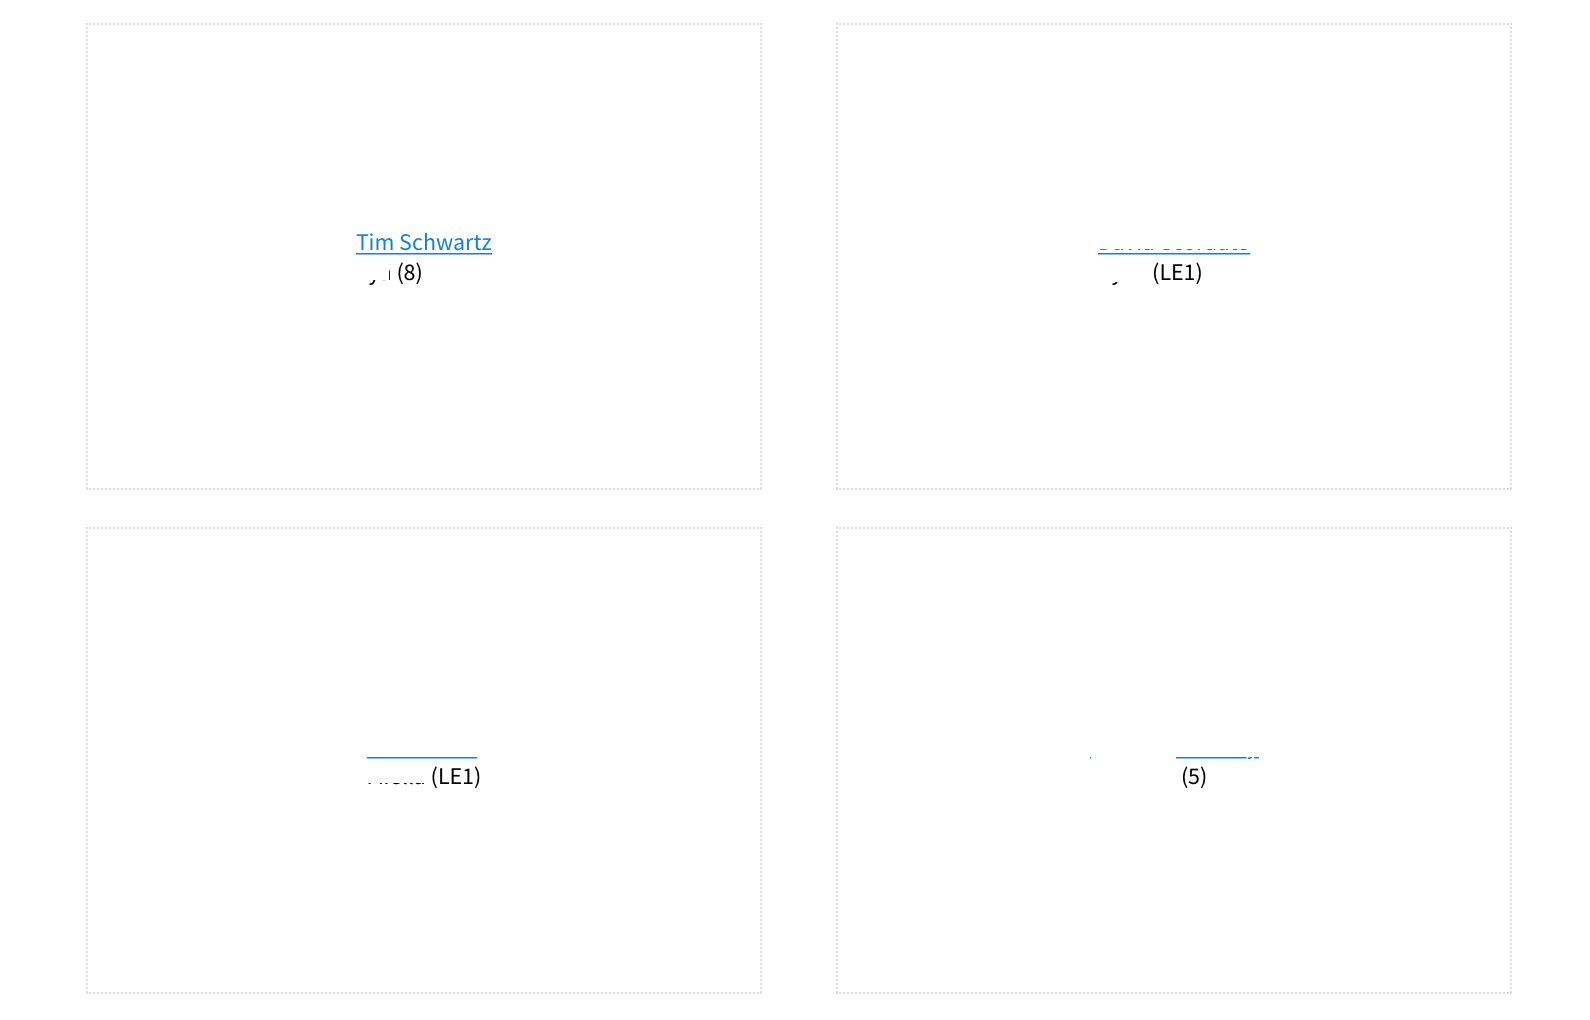
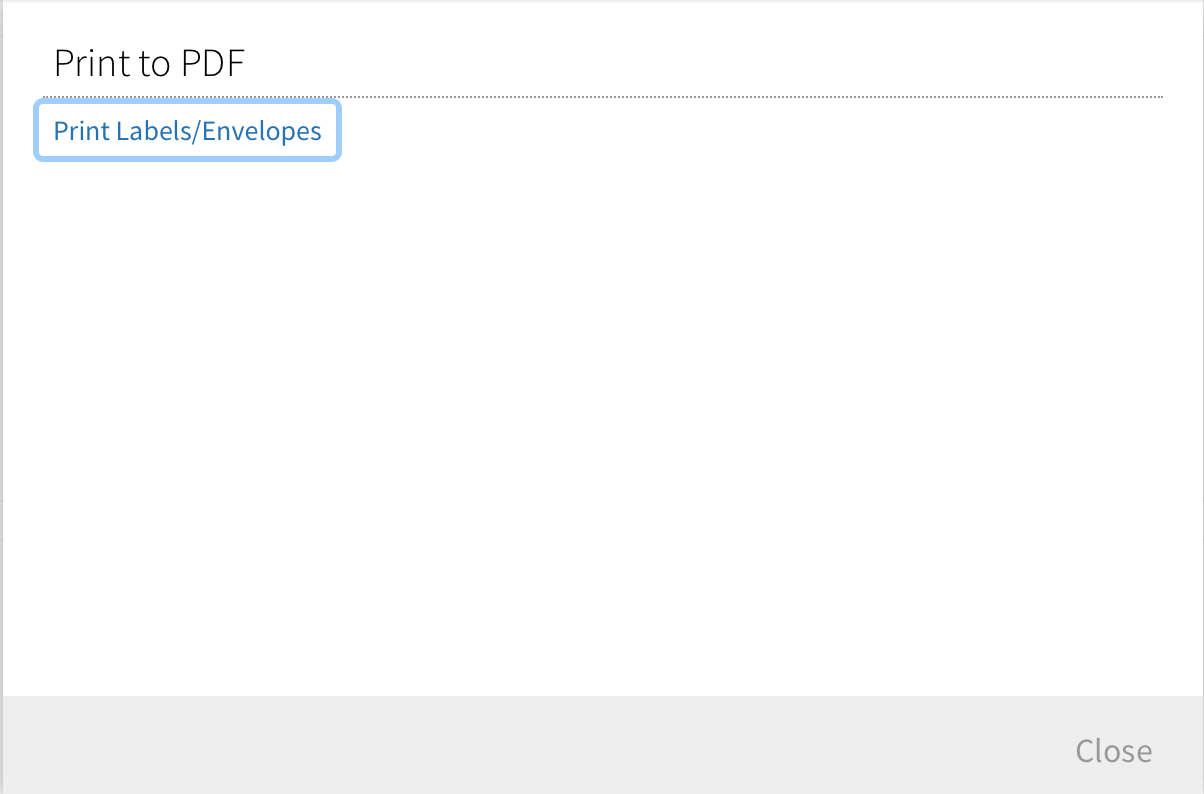
Step 4: Now you’re ready to format the labels. Click on the Lightning Bolt and choose the Print Labels/Envelopes option.
Next, apply the formatting that works for you. If you’re printing labels with children’s names then you’ll want to make those names smaller than the parent’s name. You can do that by making the First Line Font Size to be large and the Styling Font size smaller. We recommend applying the First Line Bold to make the name pop more. Here are the settings we use:
Clicking the green Print button will result in generating a PDF file. The badge will come out looking like this:

Notes:
- You can’t add your organization’s logo at the time of writing this How To but you can run blank labels through a copier once with the logo and then run them through a second time with the label. We used Avery’s online tool for adding for designing badges to add our logo.
Affiliate disclosure: When you click through from my site to a retailer or vendor and buy a product or service, I may earn affiliate commissions. This income helps support my work.
3 Common Issues When Using Google Workspace Data Migration
How to Create a Gmail Penalty Box for Students who Can’t Self-Regulate
How To Create a Report in Veracross to view the Number of Emails Parents Receive
About The Author
Tim
Tim Schwartz brings over 25 years of experience in the tech space. A lifelong learner, Tim has spent his career in spaces that allow him to combine his loves of technology and education. He cites his 12 years working abroad in a foreign language along with his BA in cultural anthropology for his deep understanding of the humanity behind different perspectives—a valuable and somewhat rare skill among technologists. Tim focuses on strengthening cybersecurity while increasing employee productivity, centralizing mobile device management, automating identity management and access, digitizing analog workflows, and introducing marketing automations to provide a positive—and digitally secure—experience for both employees and clients. Tim’s love of not only learning but also sharing what he knows extends far beyond the realm of technology. He holds a master’s degree in teaching Japanese as a foreign language, and he has authored numerous articles about improving early education and parenting.